Use these tips to get your sprinkler working again
Sprinkler systems are a necessity for anyone with a lawn. They'll save you time, money, and headaches. If you're installing new lawn sprinkler systems, make sure you choose carefully to prevent repairs later.
Sure, having sprinklers makes watering easier; however, repairing them when they're broken is less than desirable. There are plenty of factors that go into repairing a sprinkler system, but the first step is determining what needs repair and where the problem lies. Once the initial assessment is done, the rest is relatively simple—it just takes a little work to accomplish.
Essentially, you can break a sprinkler system in two places: the main line (possibly when aerating) or a sprinkler head (usually when mowing the lawn). Breaking sprinkler heads is common, so don't feel bad if you do. Pipe repair, however, is a bigger project.
Here's how to do sprinkler system repair:
Repairing a Main Line
- Determine where the line is broken. This is usually done by locating the puddle of water in the lawn or simply the geyser that's now in the lawn.
- Shut off the sprinkler main. The main is typically located just under a spigot on the side of your home; some are by the front door. If you're unsure what it looks like, it's best described as two pipes coming from the ground, one of which goes into your home. The one that isn't going into the home is the sprinkler water main.
- Dig up the affected area. Make sure you give yourself enough room to place your arms in the ground. Usually, you would dig deep enough to be just under the pipe, and extend one foot in both directions along the pipe.
- With a pipe cutter or hacksaw, cut out the broken section. Make straight cuts; if they aren't straight, you may have a bad connection when the line is fixed.
- Repair the sprinkler line with an expansion repair coupling; it is the easiest option for this type of job. Because it expands to fit the sprinkler line, you only need to cut out a small section. Place the coupling on the line to determine exactly how much of the line needs to be removed.
- Once removed, clean any dirt and water from the outside of the sprinkler line so the adhesive can bond.
- Next, use PVC blue glue (the blue glue contains primer and glue, so you don't need to buy them separately) to coat the outside of both cut ends of the pipe and the inside of the coupler that will join with the pipe.
- After you glue everything, quickly put the coupler in place and expand it to fit over the pipe on both ends. Give the coupler a small turn to help set the glue.
- Give the glue about ten minutes to cure, then turn the water on and test before covering the hole.
- If everything works out okay, pat yourself on the back and cover the hole.
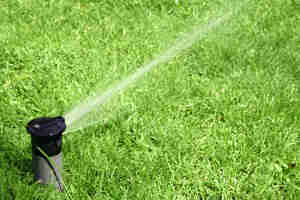 Repairing a Sprinkler Head
- Dig a small circle, about six inches, around the sprinkler head to give yourself room to work. Sprinkler heads are generally black, about one to two inches wide, and located on the outer edge of your lawn.
- Unscrew the sprinkler head, but be careful not to pull the riser out of the head. (You may need to use pliers to hold the riser in place.) Make sure no dirt or debris gets into the sprinkler line, as this could create problems later.
- Take your new head and screw it onto the riser. Risers are screwed into the sprinkler line and the bottom of the sprinkler head to help bring the sprinkler head up to the level of your lawn.
- Test your new sprinkler; if it works, cover the hole.
Repairing the Riser
- Follow Step 1 of 'Repairing a Sprinkler Head.'
- The head will come right out because it's no longer attached to the riser.
- Get a nipple extractor to remove the riser that is stuck in the sprinkler system. If enough of the riser is left in the system, you may be able to use pliers to twist it out.
- Replace the old riser with a new one. Remember not to let any dirt or debris into the sprinkler system.
- Place your sprinkler head on the riser.
- Test the system. Once again, if there's no leak, cover the hole.
If you break the sprinkler head or riser, there isn't any reason to fret; they're the easiest things to fix, even for a novice. If you're intimidated, you can certainly call in a professional; however, sprinkler repair costs can really add up if you hire someone else to do it. Charges vary by company. Doing the repair yourself will cost you maybe fifteen dollars, which is much cheaper than paying someone to do it for you. Good luck!
Repair Lawn Sprinkler Systems
Use these tips to get your sprinkler working again
Sprinkler systems are a necessity for anyone with a lawn. They'll save you time, money, and headaches. If you're installing new lawn sprinkler systems, make sure you choose carefully to prevent repairs later.
Sure, having sprinklers makes watering easier; however, repairing them when they're broken is less than desirable. There are plenty of factors that go into repairing a sprinkler system, but the first step is determining what needs repair and where the problem lies. Once the initial assessment is done, the rest is relatively simple—it just takes a little work to accomplish.
Essentially, you can break a sprinkler system in two places: the main line (possibly when aerating) or a sprinkler head (usually when mowing the lawn). Breaking sprinkler heads is common, so don't feel bad if you do. Pipe repair, however, is a bigger project.
Here's how to do sprinkler system repair:
Repairing a Main Line
- Determine where the line is broken. This is usually done by locating the puddle of water in the lawn or simply the geyser that's now in the lawn.
- Shut off the sprinkler main. The main is typically located just under a spigot on the side of your home; some are by the front door. If you're unsure what it looks like, it's best described as two pipes coming from the ground, one of which goes into your home. The one that isn't going into the home is the sprinkler water main.
- Dig up the affected area. Make sure you give yourself enough room to place your arms in the ground. Usually, you would dig deep enough to be just under the pipe, and extend one foot in both directions along the pipe.
- With a pipe cutter or hacksaw, cut out the broken section. Make straight cuts; if they aren't straight, you may have a bad connection when the line is fixed.
- Repair the sprinkler line with an expansion repair coupling; it is the easiest option for this type of job. Because it expands to fit the sprinkler line, you only need to cut out a small section. Place the coupling on the line to determine exactly how much of the line needs to be removed.
- Once removed, clean any dirt and water from the outside of the sprinkler line so the adhesive can bond.
- Next, use PVC blue glue (the blue glue contains primer and glue, so you don't need to buy them separately) to coat the outside of both cut ends of the pipe and the inside of the coupler that will join with the pipe.
- After you glue everything, quickly put the coupler in place and expand it to fit over the pipe on both ends. Give the coupler a small turn to help set the glue.
- Give the glue about ten minutes to cure, then turn the water on and test before covering the hole.
- If everything works out okay, pat yourself on the back and cover the hole.
Repairing a Sprinkler Head
- Dig a small circle, about six inches, around the sprinkler head to give yourself room to work. Sprinkler heads are generally black, about one to two inches wide, and located on the outer edge of your lawn.
- Unscrew the sprinkler head, but be careful not to pull the riser out of the head. (You may need to use pliers to hold the riser in place.) Make sure no dirt or debris gets into the sprinkler line, as this could create problems later.
- Take your new head and screw it onto the riser. Risers are screwed into the sprinkler line and the bottom of the sprinkler head to help bring the sprinkler head up to the level of your lawn.
- Test your new sprinkler; if it works, cover the hole.
Repairing the Riser
- Follow Step 1 of 'Repairing a Sprinkler Head.'
- The head will come right out because it's no longer attached to the riser.
- Get a nipple extractor to remove the riser that is stuck in the sprinkler system. If enough of the riser is left in the system, you may be able to use pliers to twist it out.
- Replace the old riser with a new one. Remember not to let any dirt or debris into the sprinkler system.
- Place your sprinkler head on the riser.
- Test the system. Once again, if there's no leak, cover the hole.
If you break the sprinkler head or riser, there isn't any reason to fret; they're the easiest things to fix, even for a novice. If you're intimidated, you can certainly call in a professional; however, sprinkler repair costs can really add up if you hire someone else to do it. Charges vary by company. Doing the repair yourself will cost you maybe fifteen dollars, which is much cheaper than paying someone to do it for you. Good luck!
Repair Lawn Sprinkler Systems
By Howtodotips
Use these tips to get your sprinkler working again