Tips to help you with car radio removal
Many people have found that it's easy and relatively inexpensive to upgrade the sound components in their cars. Head units, or stereos, are the most common component to replace. It's a job that should take a full afternoon for a do-it-yourselfer. But removing an audio system yourself can be a lot cheaper than paying a professional. Therefore, understanding how the removal works may be worth it. One of the first things you'll have to do when you want to replace your head unit is remove it from your car. How you remove it depends largely on the type of stereo and the type of car you have.
There are two main methods for removing a car stereo:
- Spring-Mounted Clips
Car stereos held in place with this method have four small clips inside that prevent the unit from sliding out of the dash. You will need to buy a pair of U-shaped DIN tools to remove the radio. At the top of the U are small poles that engage the clips. Once inserted properly, you should hear a click, and the radio should simply slide out of the dash. - Bolt-on
Stereos that are bolted to the dash can be a little more difficult to get out, but they don't require any special tools. A slight variation on this method is to have brackets mounted to the stereo that are bolted to the car. You will undoubtedly have to remove a few trim pieces to access the screws or bolts that hold the unit in place. 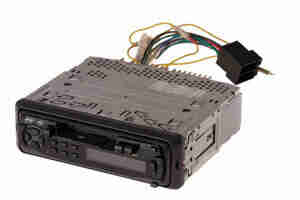 Removing the trim can be tricky, but it gets much easier with practice. Here's how it generally works:
- There should be a trim piece, maybe two, surrounding the face of your stereo. Find the screws that hold this in place. They are usually well hidden from normal view. You may have to access them through the ashtray, cigarette lighter assembly, or glove box. Once you find them, remove them.
- Trim almost always has hidden clips as well, and you'll need to pull firmly but carefully to remove the trim from the clips. Be careful not to lose any clips, or you may notice new rattles when you drive down the road. You can buy tools to help you remove those clips without damaging the plastic. Alternatively, you can use a large flat-head screwdriver, but you run a high risk of scratching or cracking the trim when you pry it away.
- Once you have the trim pieces removed, take off the screws or bolts holding the unit in place. The unit should slide out of the dash.
- Next, disconnect the electrical connectors in the back of the stereo. Unscrew the antenna cable first. It's usually the farthest connection toward the passenger's side.
- Then remove the power connection. It's usually the connector closest to the driver's side.
- Finally, remove the wiring harness connector from the back of the stereo. The wiring harness is the plastic connector that incorporates all of the wiring into a single connection. If your car speakers aren't blown, you can leave them in the car and connect your next stereo to them. You can also reuse the wiring that's in your car.
- Now that you have removed the electrical connections from the back of the equipment, the unit should come completely free.
Now you know how to remove car stereo systems on your own!
Remove Car Stereo Systems: Speakers and Wiring Harness
Tips to help you with car radio removal
Many people have found that it's easy and relatively inexpensive to upgrade the sound components in their cars. Head units, or stereos, are the most common component to replace. It's a job that should take a full afternoon for a do-it-yourselfer. But removing an audio system yourself can be a lot cheaper than paying a professional. Therefore, understanding how the removal works may be worth it. One of the first things you'll have to do when you want to replace your head unit is remove it from your car. How you remove it depends largely on the type of stereo and the type of car you have.
There are two main methods for removing a car stereo:
- Spring-Mounted Clips
Car stereos held in place with this method have four small clips inside that prevent the unit from sliding out of the dash. You will need to buy a pair of U-shaped DIN tools to remove the radio. At the top of the U are small poles that engage the clips. Once inserted properly, you should hear a click, and the radio should simply slide out of the dash. - Bolt-on
Stereos that are bolted to the dash can be a little more difficult to get out, but they don't require any special tools. A slight variation on this method is to have brackets mounted to the stereo that are bolted to the car. You will undoubtedly have to remove a few trim pieces to access the screws or bolts that hold the unit in place. Removing the trim can be tricky, but it gets much easier with practice. Here's how it generally works:- There should be a trim piece, maybe two, surrounding the face of your stereo. Find the screws that hold this in place. They are usually well hidden from normal view. You may have to access them through the ashtray, cigarette lighter assembly, or glove box. Once you find them, remove them.
- Trim almost always has hidden clips as well, and you'll need to pull firmly but carefully to remove the trim from the clips. Be careful not to lose any clips, or you may notice new rattles when you drive down the road. You can buy tools to help you remove those clips without damaging the plastic. Alternatively, you can use a large flat-head screwdriver, but you run a high risk of scratching or cracking the trim when you pry it away.
- Once you have the trim pieces removed, take off the screws or bolts holding the unit in place. The unit should slide out of the dash.
- Next, disconnect the electrical connectors in the back of the stereo. Unscrew the antenna cable first. It's usually the farthest connection toward the passenger's side.
- Then remove the power connection. It's usually the connector closest to the driver's side.
- Finally, remove the wiring harness connector from the back of the stereo. The wiring harness is the plastic connector that incorporates all of the wiring into a single connection. If your car speakers aren't blown, you can leave them in the car and connect your next stereo to them. You can also reuse the wiring that's in your car.
- Now that you have removed the electrical connections from the back of the equipment, the unit should come completely free.
Now you know how to remove car stereo systems on your own!
Remove Car Stereo Systems: Speakers and Wiring Harness
By Howtodotips
Tips to help you with car radio removal