A step-by-step guide to installing in-ceiling speakers for a discreet surround sound system, covering preparation, cutting, wiring, and testing.
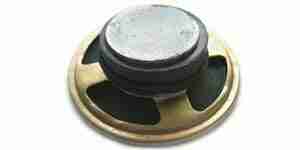
Nowadays, many people want the luxury of a surround sound system without the eyesore of speakers hanging everywhere. Fortunately, you can buy speakers that sit flush with your ceiling, out of sight, without sacrificing sound quality.
Step 1
First things first. This article assumes that you have a pre-wired room or have already run speaker wire to the locations where you will be mounting speakers. Almost every new home is prewired with at least a 5.1 system in mind, and most older homes can be retrofitted with minimal construction. If you are not comfortable crawling around in your attic, it is best to have a professional do this for you.
Step 2
Now, gather everything you will need. You need:
- A drywall knife (available at Lowe's or Home Depot for around $10)
- A writing utensil (pencils work best, since you will be writing upside down.)
- A ladder to safely reach your ceiling
- A stud finder
- A power screwdriver with an extended Phillips head bit (at least 4")
- Damp paper towel (for removing fingerprints at the end)
- Lastly, a tarp or sheet to lay down to minimize cleanup
Step 3
Now that everything is ready, remove the speakers from their packaging and set them aside. Inside the box, you should find a template, usually a cardboard cutout, that indicates the size of the hole required in the ceiling. Use this template to help you lay out where the speakers will go. If you have a pre-wired home, this is pretty much already done for you.
Step 4
Set up your tarp and ladder under the location of the first speaker. Use your stud finder to verify where the studs are in your ceiling. You want to make sure you have a good idea of what is above you. Once you have located the studs, hold your template between the two studs where you want your speaker to sit and trace the hole with your pencil.
Step 5
This is the messy part. Using your drywall knife, cut out the traced hole in your ceiling. There will be a good amount of dust, and if you have insulation, it will blow all over the place. Keep that in mind if you have severe allergies or valuable furniture that should be covered up.
Step 6
Once the hole is cut, clear out the area in the attic to make sure the speaker has room to fit up there. Attach your speaker wire to the + and - terminals on the speaker (usually red for + and black for -). Making sure not to pinch the wire, slowly push the speaker up into the hole. Depending on your tracing and cutting ability, it might be a tight squeeze or it may sit loosely. Use your power screwdriver with the extended bit to tighten the screws on the speaker that secure its clamps to the drywall. Every model has its own way to do this, so check your manual. Make sure not to overtighten the clamps, as you can easily crack the drywall. Most speakers also come with a grill cover; this is the time to put that on.
Step 7
Repeat the previous process for any other in-ceiling speakers. Once they are installed, either hook them up to the receiver or use the battery trick to ensure they are connected properly. The battery trick is to take a AA or AAA battery and touch it to the leads of the speaker wire. If it is connected properly, the battery will send a small current through the wire and cause the speaker to "pop" momentarily. This is also a great way to track down which wire goes to which speaker if they aren't labeled.
That's it. You've got theater-quality speakers installed in your ceiling. They're relatively maintenance-free and almost completely out of sight. Now you just have to clean everything up...
Install ceiling speakers
A step-by-step guide to installing in-ceiling speakers for a discreet surround sound system, covering preparation, cutting, wiring, and testing.
Nowadays, many people want the luxury of a surround sound system without the eyesore of speakers hanging everywhere. Fortunately, you can buy speakers that sit flush with your ceiling, out of sight, without sacrificing sound quality.
Step 1
First things first. This article assumes that you have a pre-wired room or have already run speaker wire to the locations where you will be mounting speakers. Almost every new home is prewired with at least a 5.1 system in mind, and most older homes can be retrofitted with minimal construction. If you are not comfortable crawling around in your attic, it is best to have a professional do this for you.
Step 2
Now, gather everything you will need. You need:
- A drywall knife (available at Lowe's or Home Depot for around $10)
- A writing utensil (pencils work best, since you will be writing upside down.)
- A ladder to safely reach your ceiling
- A stud finder
- A power screwdriver with an extended Phillips head bit (at least 4")
- Damp paper towel (for removing fingerprints at the end)
- Lastly, a tarp or sheet to lay down to minimize cleanup
Step 3
Now that everything is ready, remove the speakers from their packaging and set them aside. Inside the box, you should find a template, usually a cardboard cutout, that indicates the size of the hole required in the ceiling. Use this template to help you lay out where the speakers will go. If you have a pre-wired home, this is pretty much already done for you.
Step 4
Set up your tarp and ladder under the location of the first speaker. Use your stud finder to verify where the studs are in your ceiling. You want to make sure you have a good idea of what is above you. Once you have located the studs, hold your template between the two studs where you want your speaker to sit and trace the hole with your pencil.
Step 5
This is the messy part. Using your drywall knife, cut out the traced hole in your ceiling. There will be a good amount of dust, and if you have insulation, it will blow all over the place. Keep that in mind if you have severe allergies or valuable furniture that should be covered up.
Step 6
Once the hole is cut, clear out the area in the attic to make sure the speaker has room to fit up there. Attach your speaker wire to the + and - terminals on the speaker (usually red for + and black for -). Making sure not to pinch the wire, slowly push the speaker up into the hole. Depending on your tracing and cutting ability, it might be a tight squeeze or it may sit loosely. Use your power screwdriver with the extended bit to tighten the screws on the speaker that secure its clamps to the drywall. Every model has its own way to do this, so check your manual. Make sure not to overtighten the clamps, as you can easily crack the drywall. Most speakers also come with a grill cover; this is the time to put that on.
Step 7
Repeat the previous process for any other in-ceiling speakers. Once they are installed, either hook them up to the receiver or use the battery trick to ensure they are connected properly. The battery trick is to take a AA or AAA battery and touch it to the leads of the speaker wire. If it is connected properly, the battery will send a small current through the wire and cause the speaker to "pop" momentarily. This is also a great way to track down which wire goes to which speaker if they aren't labeled.
That's it. You've got theater-quality speakers installed in your ceiling. They're relatively maintenance-free and almost completely out of sight. Now you just have to clean everything up...
Install ceiling speakers
By Howtodotips
A step-by-step guide to installing in-ceiling speakers for a discreet surround sound system, covering preparation, cutting, wiring, and testing.