Learn how to make a stylish beaded eyeglass chain with this simple step-by-step guide, including the supplies you need and tips for securing your design.
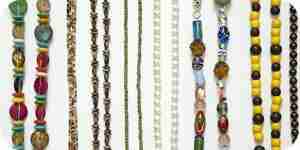
If you are forever misplacing your glasses, keeping them on a chain might help. You don't have to settle for a boring chain, though. Follow these instructions to learn how to make a beaded eyeglass chain that everyone will admire.
Step 1
Gather your supplies. When making a beaded eyeglass chain, you will need the following:
- Beads (size, color, and shape are up to you!)
- Beading thread
- Plastic eyeglass holders
- Crimp beads
- Scissors
- Needle-nose pliers
- Crazy glue (optional)
Step 2
Create your bead pattern. Before you begin making your beaded eyeglass chain, you should decide on the pattern for your beads. Lay out your beads on a towel or any other soft surface where they won't roll away. A bead tray is ideal to use for this, if you have one. Ensure that you have enough beads of each type and color before you move on to the next step.
Step 3
Start your beaded eyeglass chain. You are now ready to prepare the chain to hold your eyeglasses. Start by cutting a length of beading thread between 26" and 36" long. It is always a good idea to test the strength of your beading thread first to ensure that it won't snap when gently tugged. Put the thread through a crimp bead and then through one eyeglass holder. Then, work it back through the crimp bead and crimp the bead tightly over the thread. (As you are stringing on the first couple of beads, hide this loose end of the thread under the beads.)
One by one, start putting your beads onto the beading thread. Make sure to stop and check your bead pattern for mistakes every once in a while. Continue this until you have used all of your beads and the eyeglass chain has reached your desired length.
Step 4
Clamp off the eyeglass chain. Once all of your beads are on your beaded eyeglass chain, you need to secure the other end so that the beads don't fall off. To do this, put a second crimp bead onto the end of the beading string where you just finished stringing your beads. Then, place the second eyeglass holder onto the same end, thread the beading thread through both, and try to hide the end of it under the last few beads of the necklace. Use your needle-nose pliers to clamp the crimp bead in place. Cut off any remaining visible thread. (Don't do this until you are positive that the crimp bead isn't too loose, or you may lose all of your beads!)
Step 5
Secure everything in place. As an added precaution to prevent your beaded eyeglass chain from breaking or loosening, get out your crazy glue and put a little bit of it on the threads at each end. If you can glue the top and bottom of the crimp bead where the beading thread enters and exits, your chain will be stronger and shouldn't loosen. Once the super glue is dry, attach your eyeglasses to the beaded chain, place everything over your neck, and proudly show off your newest crafty accessory.
How to Make a Beaded Eyeglass Chain
Learn how to make a stylish beaded eyeglass chain with this simple step-by-step guide, including the supplies you need and tips for securing your design.
If you are forever misplacing your glasses, keeping them on a chain might help. You don't have to settle for a boring chain, though. Follow these instructions to learn how to make a beaded eyeglass chain that everyone will admire.
Step 1
Gather your supplies. When making a beaded eyeglass chain, you will need the following:
- Beads (size, color, and shape are up to you!)
- Beading thread
- Plastic eyeglass holders
- Crimp beads
- Scissors
- Needle-nose pliers
- Crazy glue (optional)
Step 2
Create your bead pattern. Before you begin making your beaded eyeglass chain, you should decide on the pattern for your beads. Lay out your beads on a towel or any other soft surface where they won't roll away. A bead tray is ideal to use for this, if you have one. Ensure that you have enough beads of each type and color before you move on to the next step.
Step 3
Start your beaded eyeglass chain. You are now ready to prepare the chain to hold your eyeglasses. Start by cutting a length of beading thread between 26" and 36" long. It is always a good idea to test the strength of your beading thread first to ensure that it won't snap when gently tugged. Put the thread through a crimp bead and then through one eyeglass holder. Then, work it back through the crimp bead and crimp the bead tightly over the thread. (As you are stringing on the first couple of beads, hide this loose end of the thread under the beads.)
One by one, start putting your beads onto the beading thread. Make sure to stop and check your bead pattern for mistakes every once in a while. Continue this until you have used all of your beads and the eyeglass chain has reached your desired length.
Step 4
Clamp off the eyeglass chain. Once all of your beads are on your beaded eyeglass chain, you need to secure the other end so that the beads don't fall off. To do this, put a second crimp bead onto the end of the beading string where you just finished stringing your beads. Then, place the second eyeglass holder onto the same end, thread the beading thread through both, and try to hide the end of it under the last few beads of the necklace. Use your needle-nose pliers to clamp the crimp bead in place. Cut off any remaining visible thread. (Don't do this until you are positive that the crimp bead isn't too loose, or you may lose all of your beads!)
Step 5
Secure everything in place. As an added precaution to prevent your beaded eyeglass chain from breaking or loosening, get out your crazy glue and put a little bit of it on the threads at each end. If you can glue the top and bottom of the crimp bead where the beading thread enters and exits, your chain will be stronger and shouldn't loosen. Once the super glue is dry, attach your eyeglasses to the beaded chain, place everything over your neck, and proudly show off your newest crafty accessory.
How to Make a Beaded Eyeglass Chain
By Howtodotips
Learn how to make a stylish beaded eyeglass chain with this simple step-by-step guide, including the supplies you need and tips for securing your design.